The 40 Meter Pixie (available at the time of writing for about $7 assembled on eBay) is an interesting minimalist transceiver design – crystal controlled, 2 transistors and an audio amplifier chip. And you are on the air with a unit that you can make QSO’s with! Naturally, there is much room for improvement, and it can in fact be done for only a few dollars more. Below I describe a set of additions that I think really enhances the Pixie’s usefulness.
PIXIE MODS – EXTERNAL CRYSTAL (OR VFO) CONNECTOR
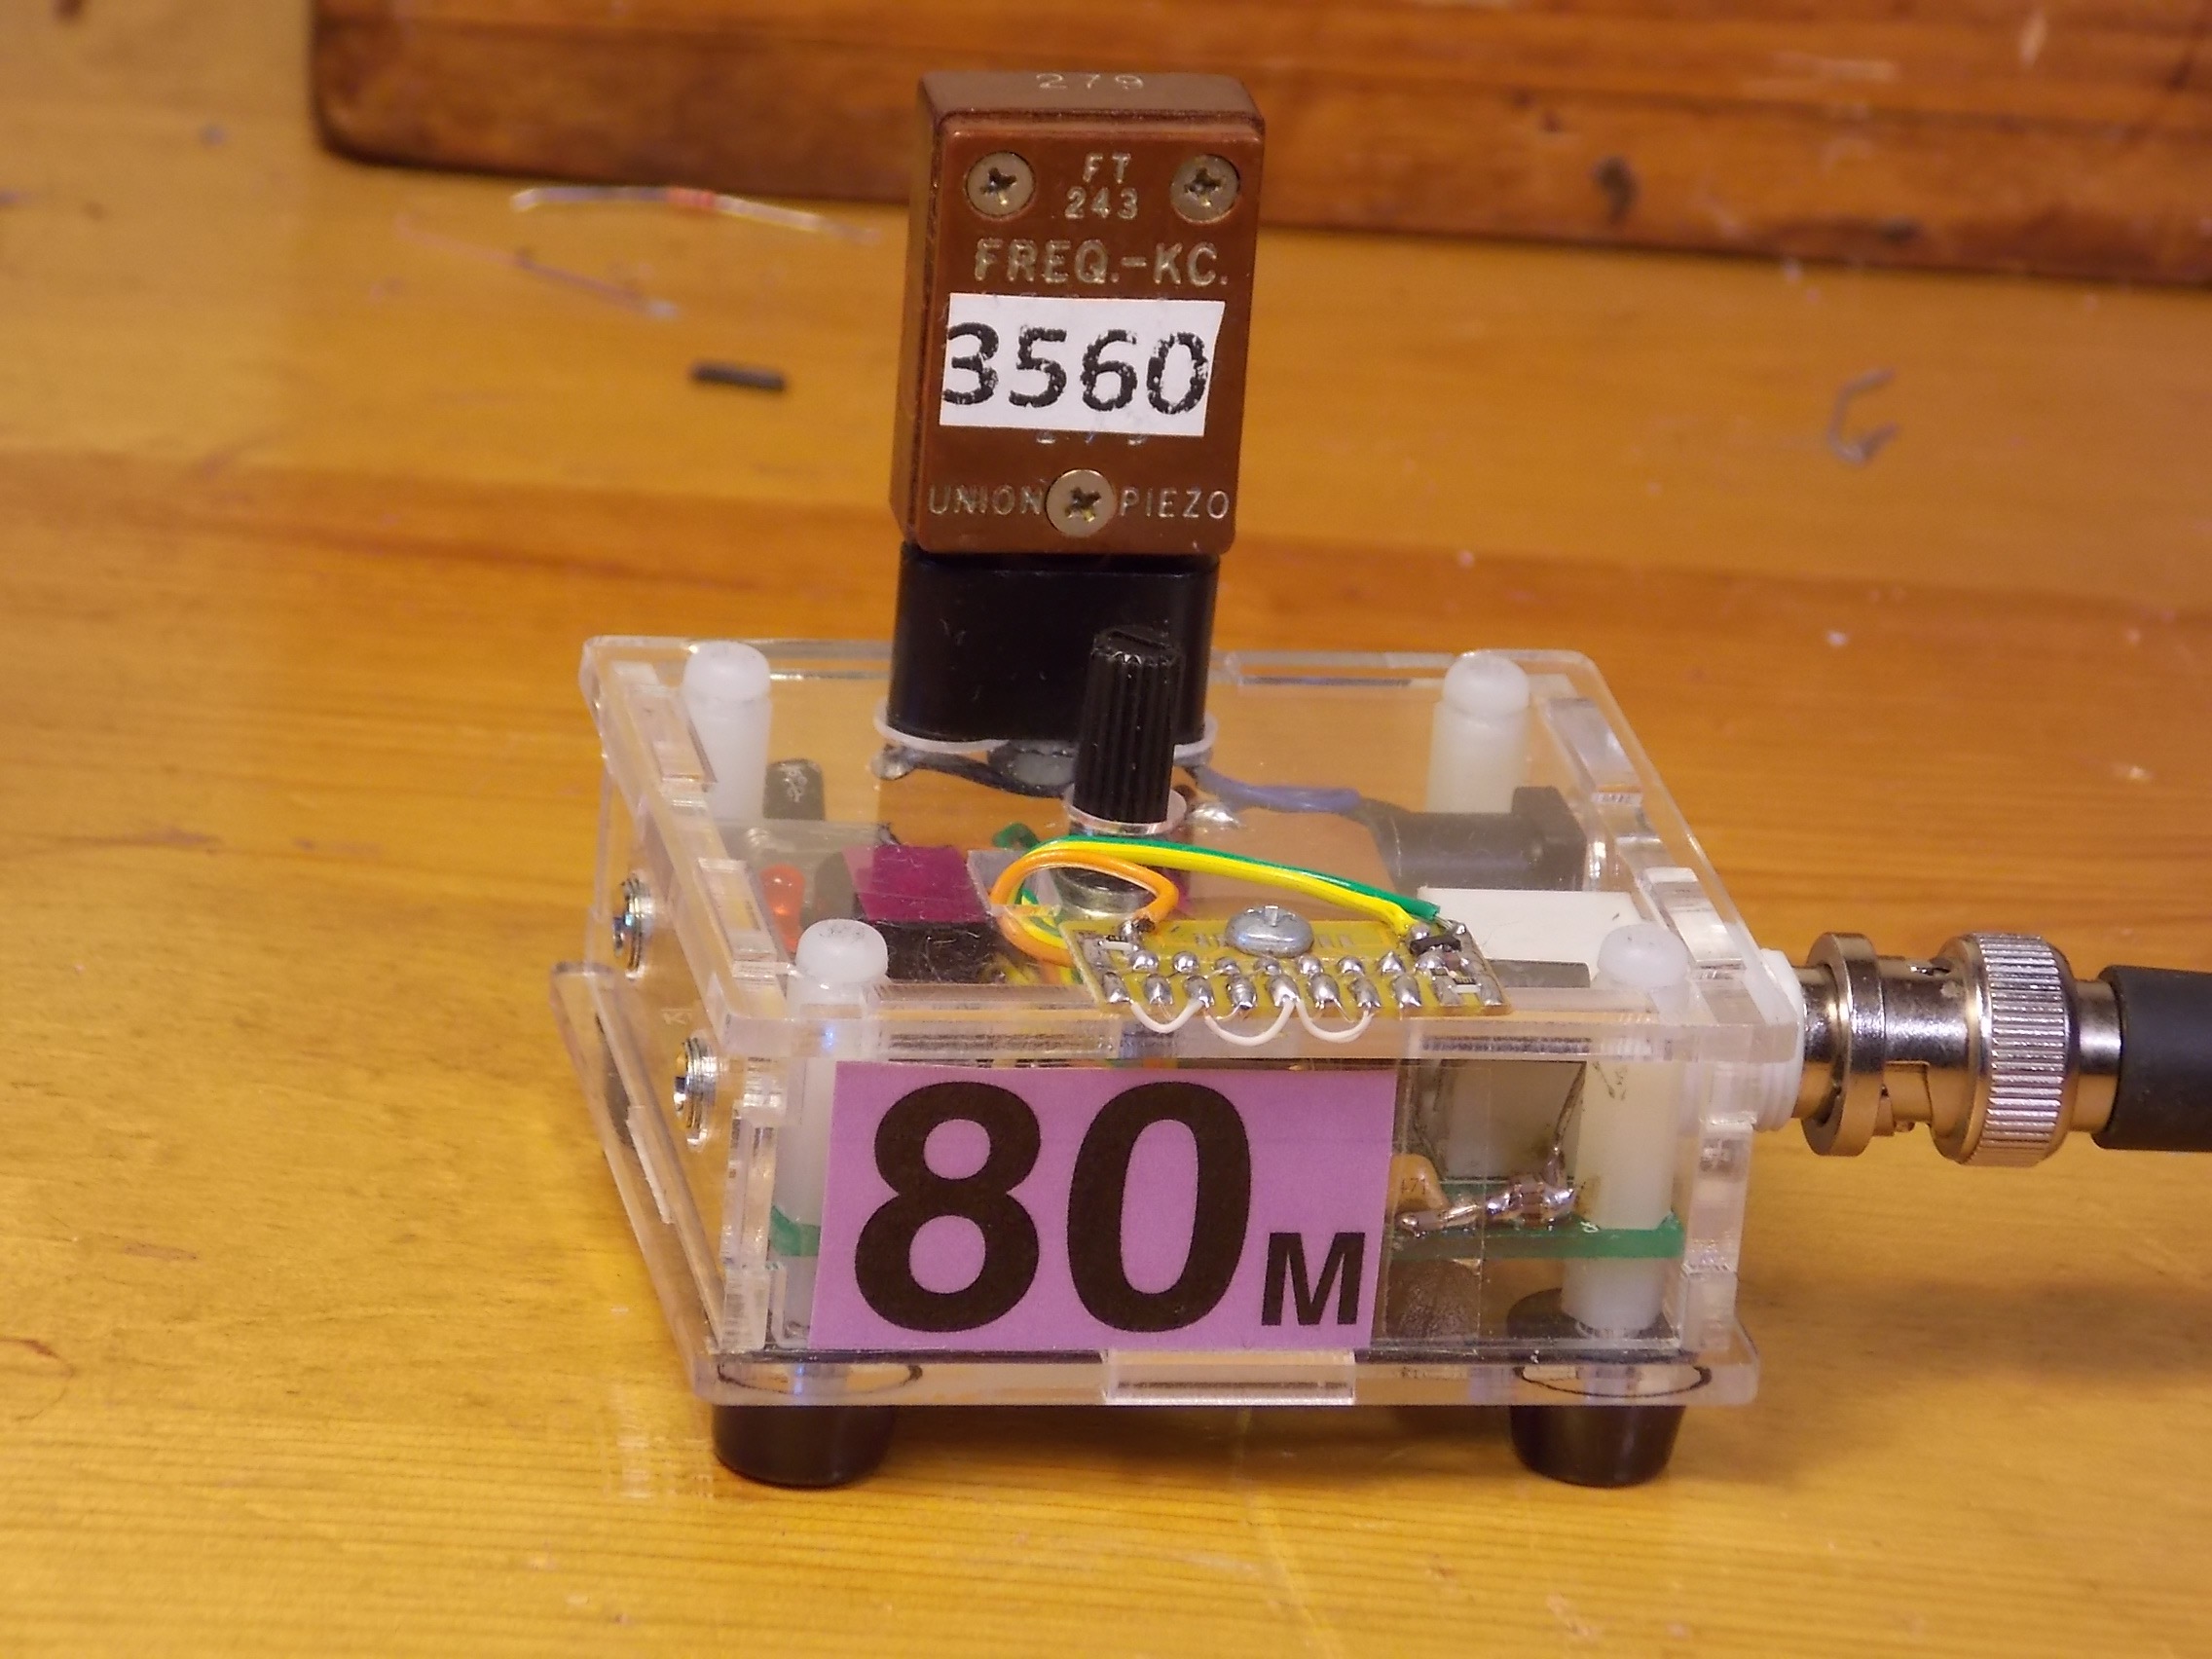
In addition to the 1 to 2 Watt Power Output Mod linked at the end of this article, another useful modification to the Pixie unit itself is simply the addition of an external crystal socket. The existing crystal is removed, and the blue wires soldered in it’s place connecting to the FT-243 crystal socket, or whatever socket type you prefer, installed on the top cover ===>
PIXIE MODS – RESISTIVE TOUCH KEYER
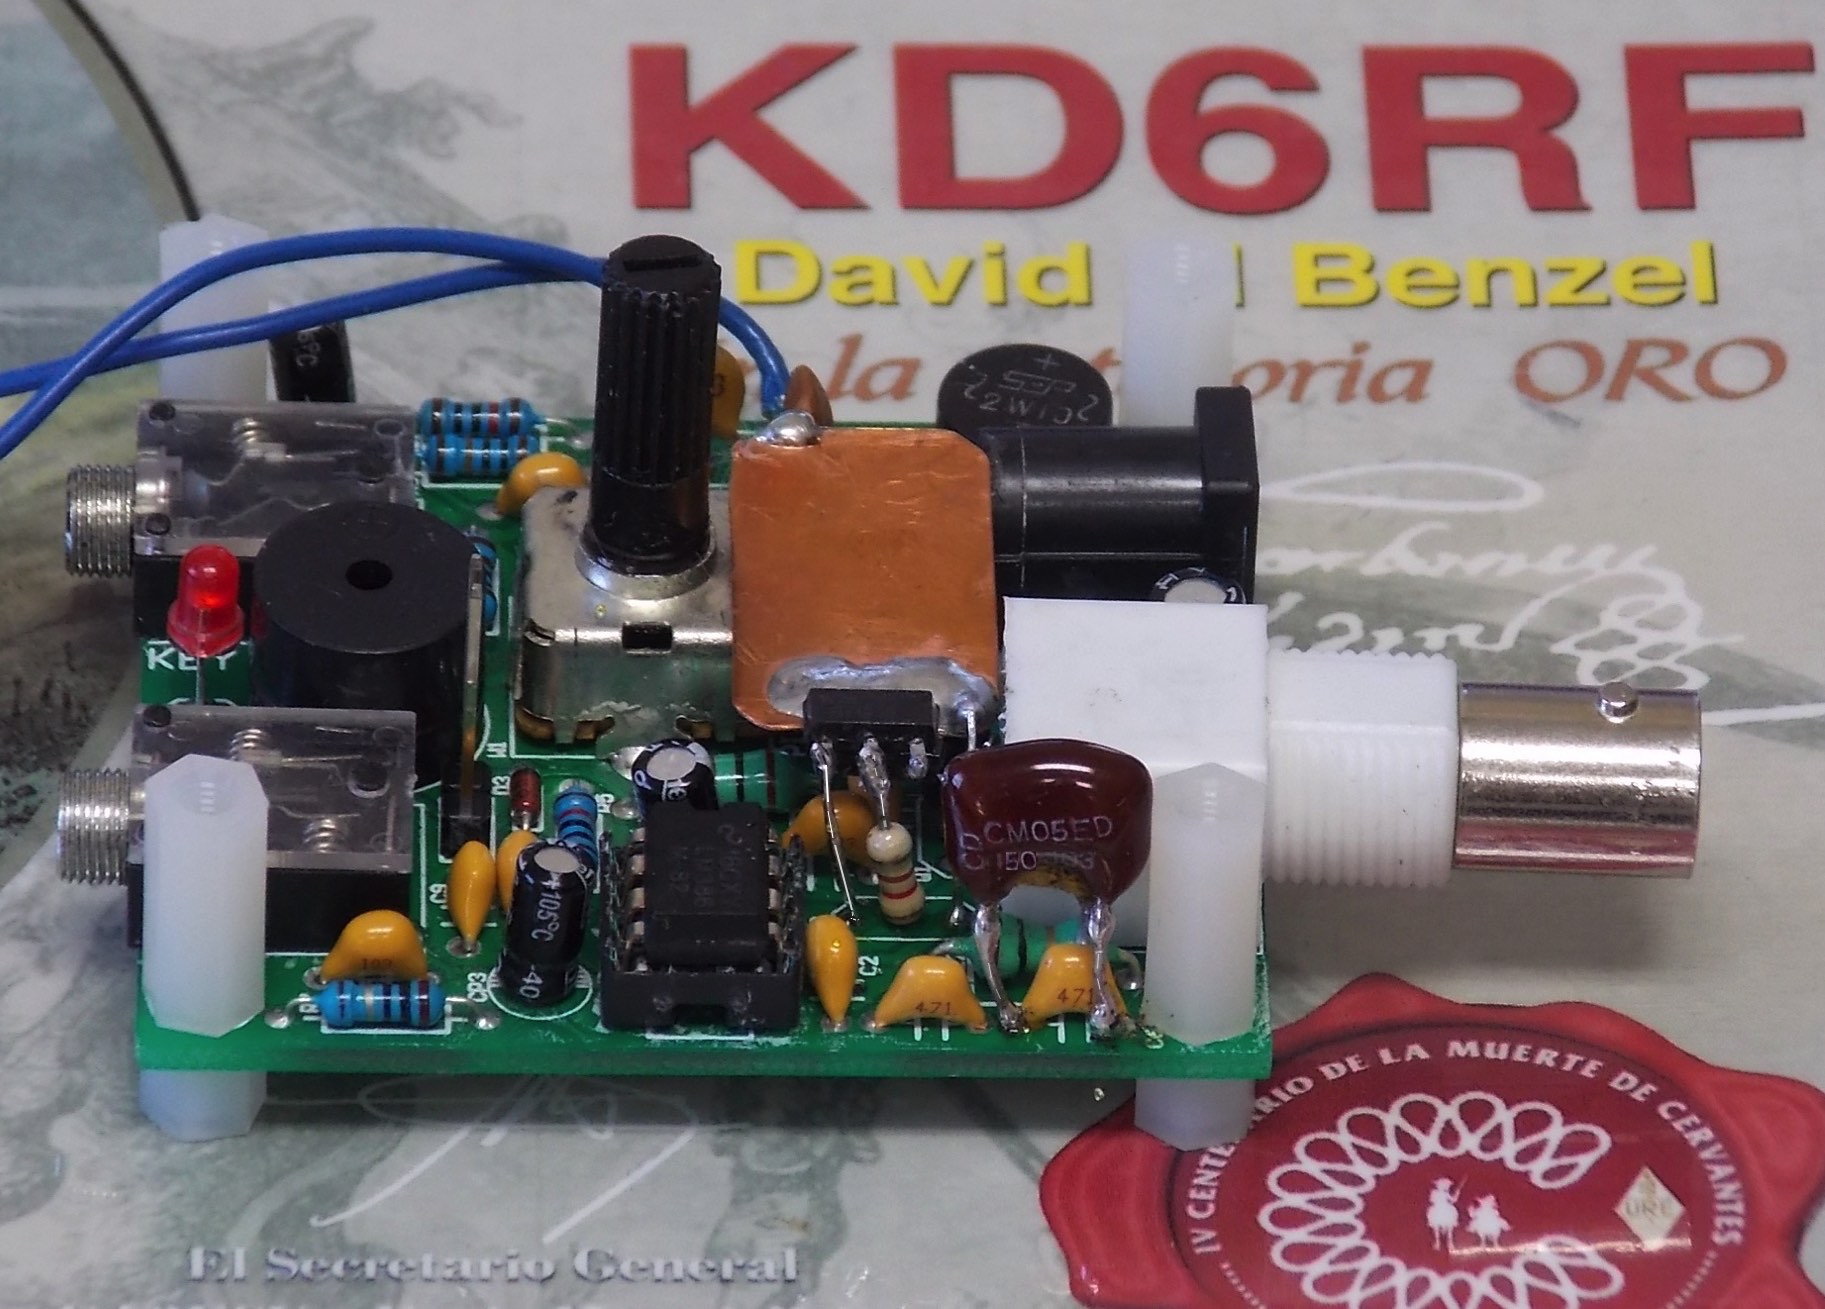
The on-board keyer is simply a FET switch with very high 20 Meg Ohm pull-down resistance on it’s gate. The gate is also bypassed for RF. The alternating solder dots are alternately connected to +12 Volts through a 10 K resistor and to the FET’s gate. The FET’s output drain lead is simply connected to the Pixie’s “key” line.
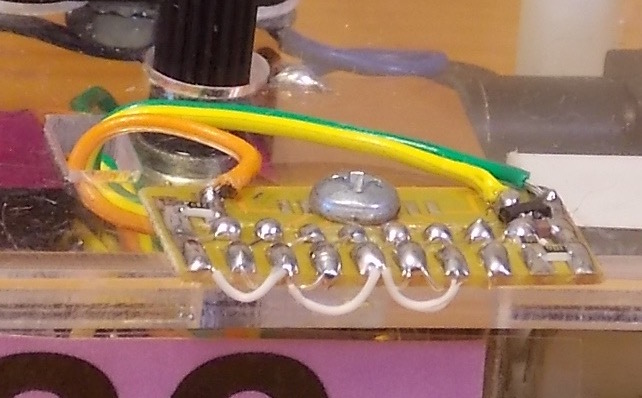
As fun as it was to design and is to use, of course it’s flaw is that it gets stuck on Transmit when wet! I recommend a capacitive touch unit using one of the standard chips if you want to go this route.
EXTERNAL CW FILTER, BATTERIES, AND AUDIO AMPLIFIER
All of the batteries, CW filter, and audio amplifier components are installed into a gutted cheapo “USB Speaker” commonly found on eBay and other sites for $6 or so. The audio output section is simply a standard LM386.
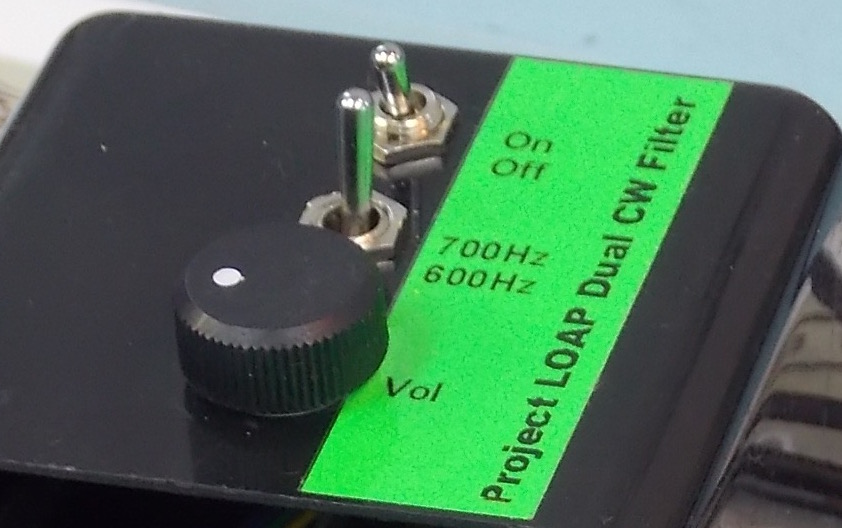
The CW filter consists of 2 bandpass stages in cascade with a total gain of approximately 13 dB. It is designed with 2 switchable frequencies – approximately 600 Hz and 700 Hz. Naturally, these are quite component tolerance dependent, and both turned out about 15 Hz high in this unit. It is recommended that 1% components be used for this filter.
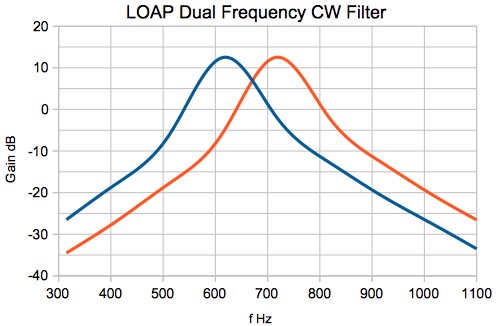 The two CW filter frequencies are useful for separating CW signals that happen to convert down to baseband on the same tone, one an upper-sideband, and the other a lower-sideband. If this occurs, simply flip the switch to the other CW frequency and re-tune the Pixie’s BFO; the unwanted sideband signal is now more than 200 Hz away, is attenuated by about 25 dB, and the desired signal pops out.
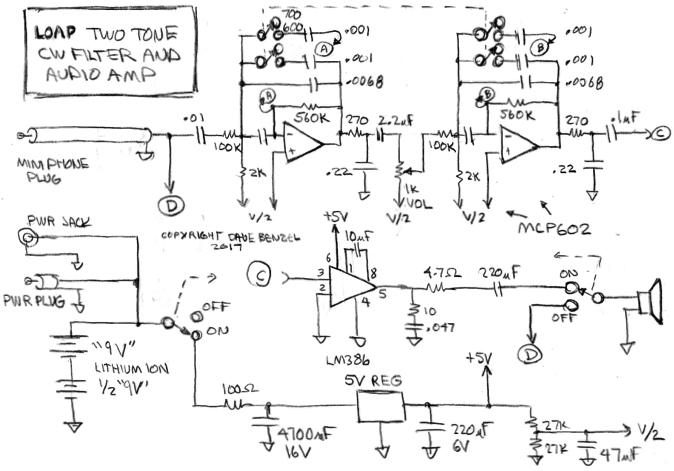 Construction for this unit is with standard surface mount components – SO-8 IC packages and 0805 sized passive components.
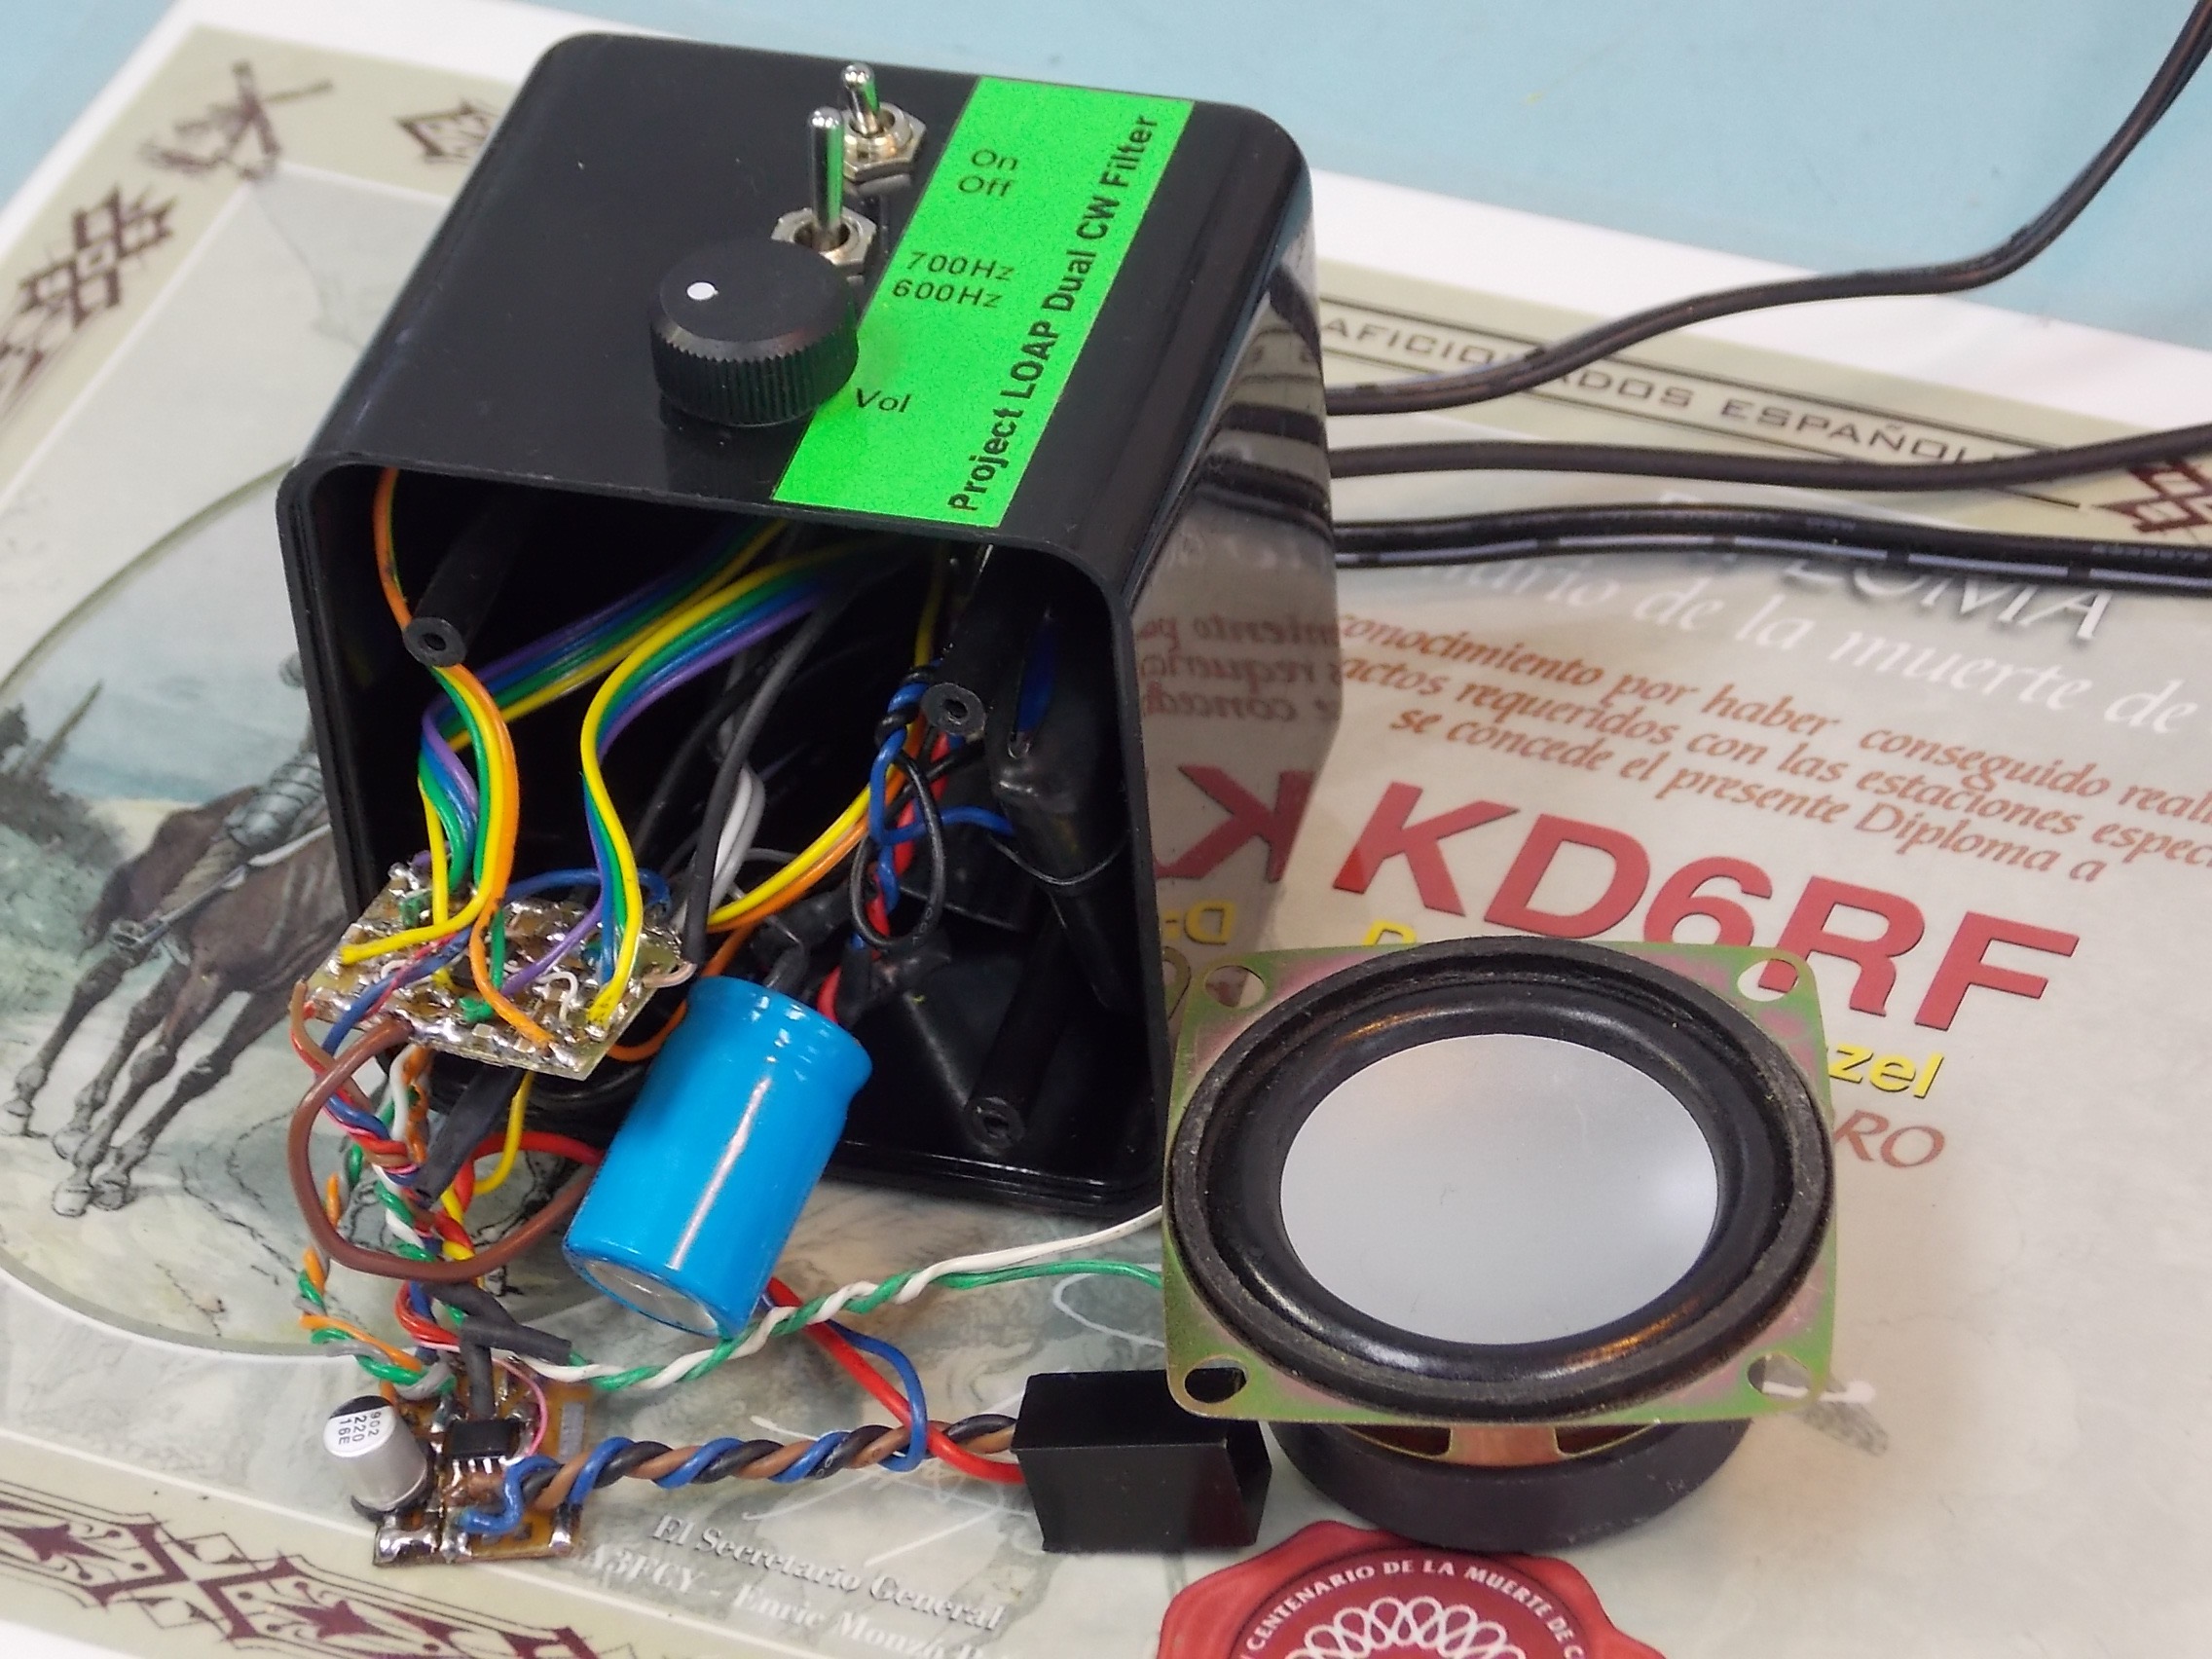
The circuit boards are wired into the speaker box along with the rechargeable Lithium battery supply. The Lithium battery supply is 12.5 Volts nominal and consists of a “9V” battery (actually a bit over 8 Volts) and one of the two 4 Volt units inside the “9V” pack. This battery pack easily supplies the unit for all day operation.
Here are the wired circuit boards ready to velcro into the box. Yes, it all easily fits! A small foam piece is also inserted to make sure nothing rattles around ===>
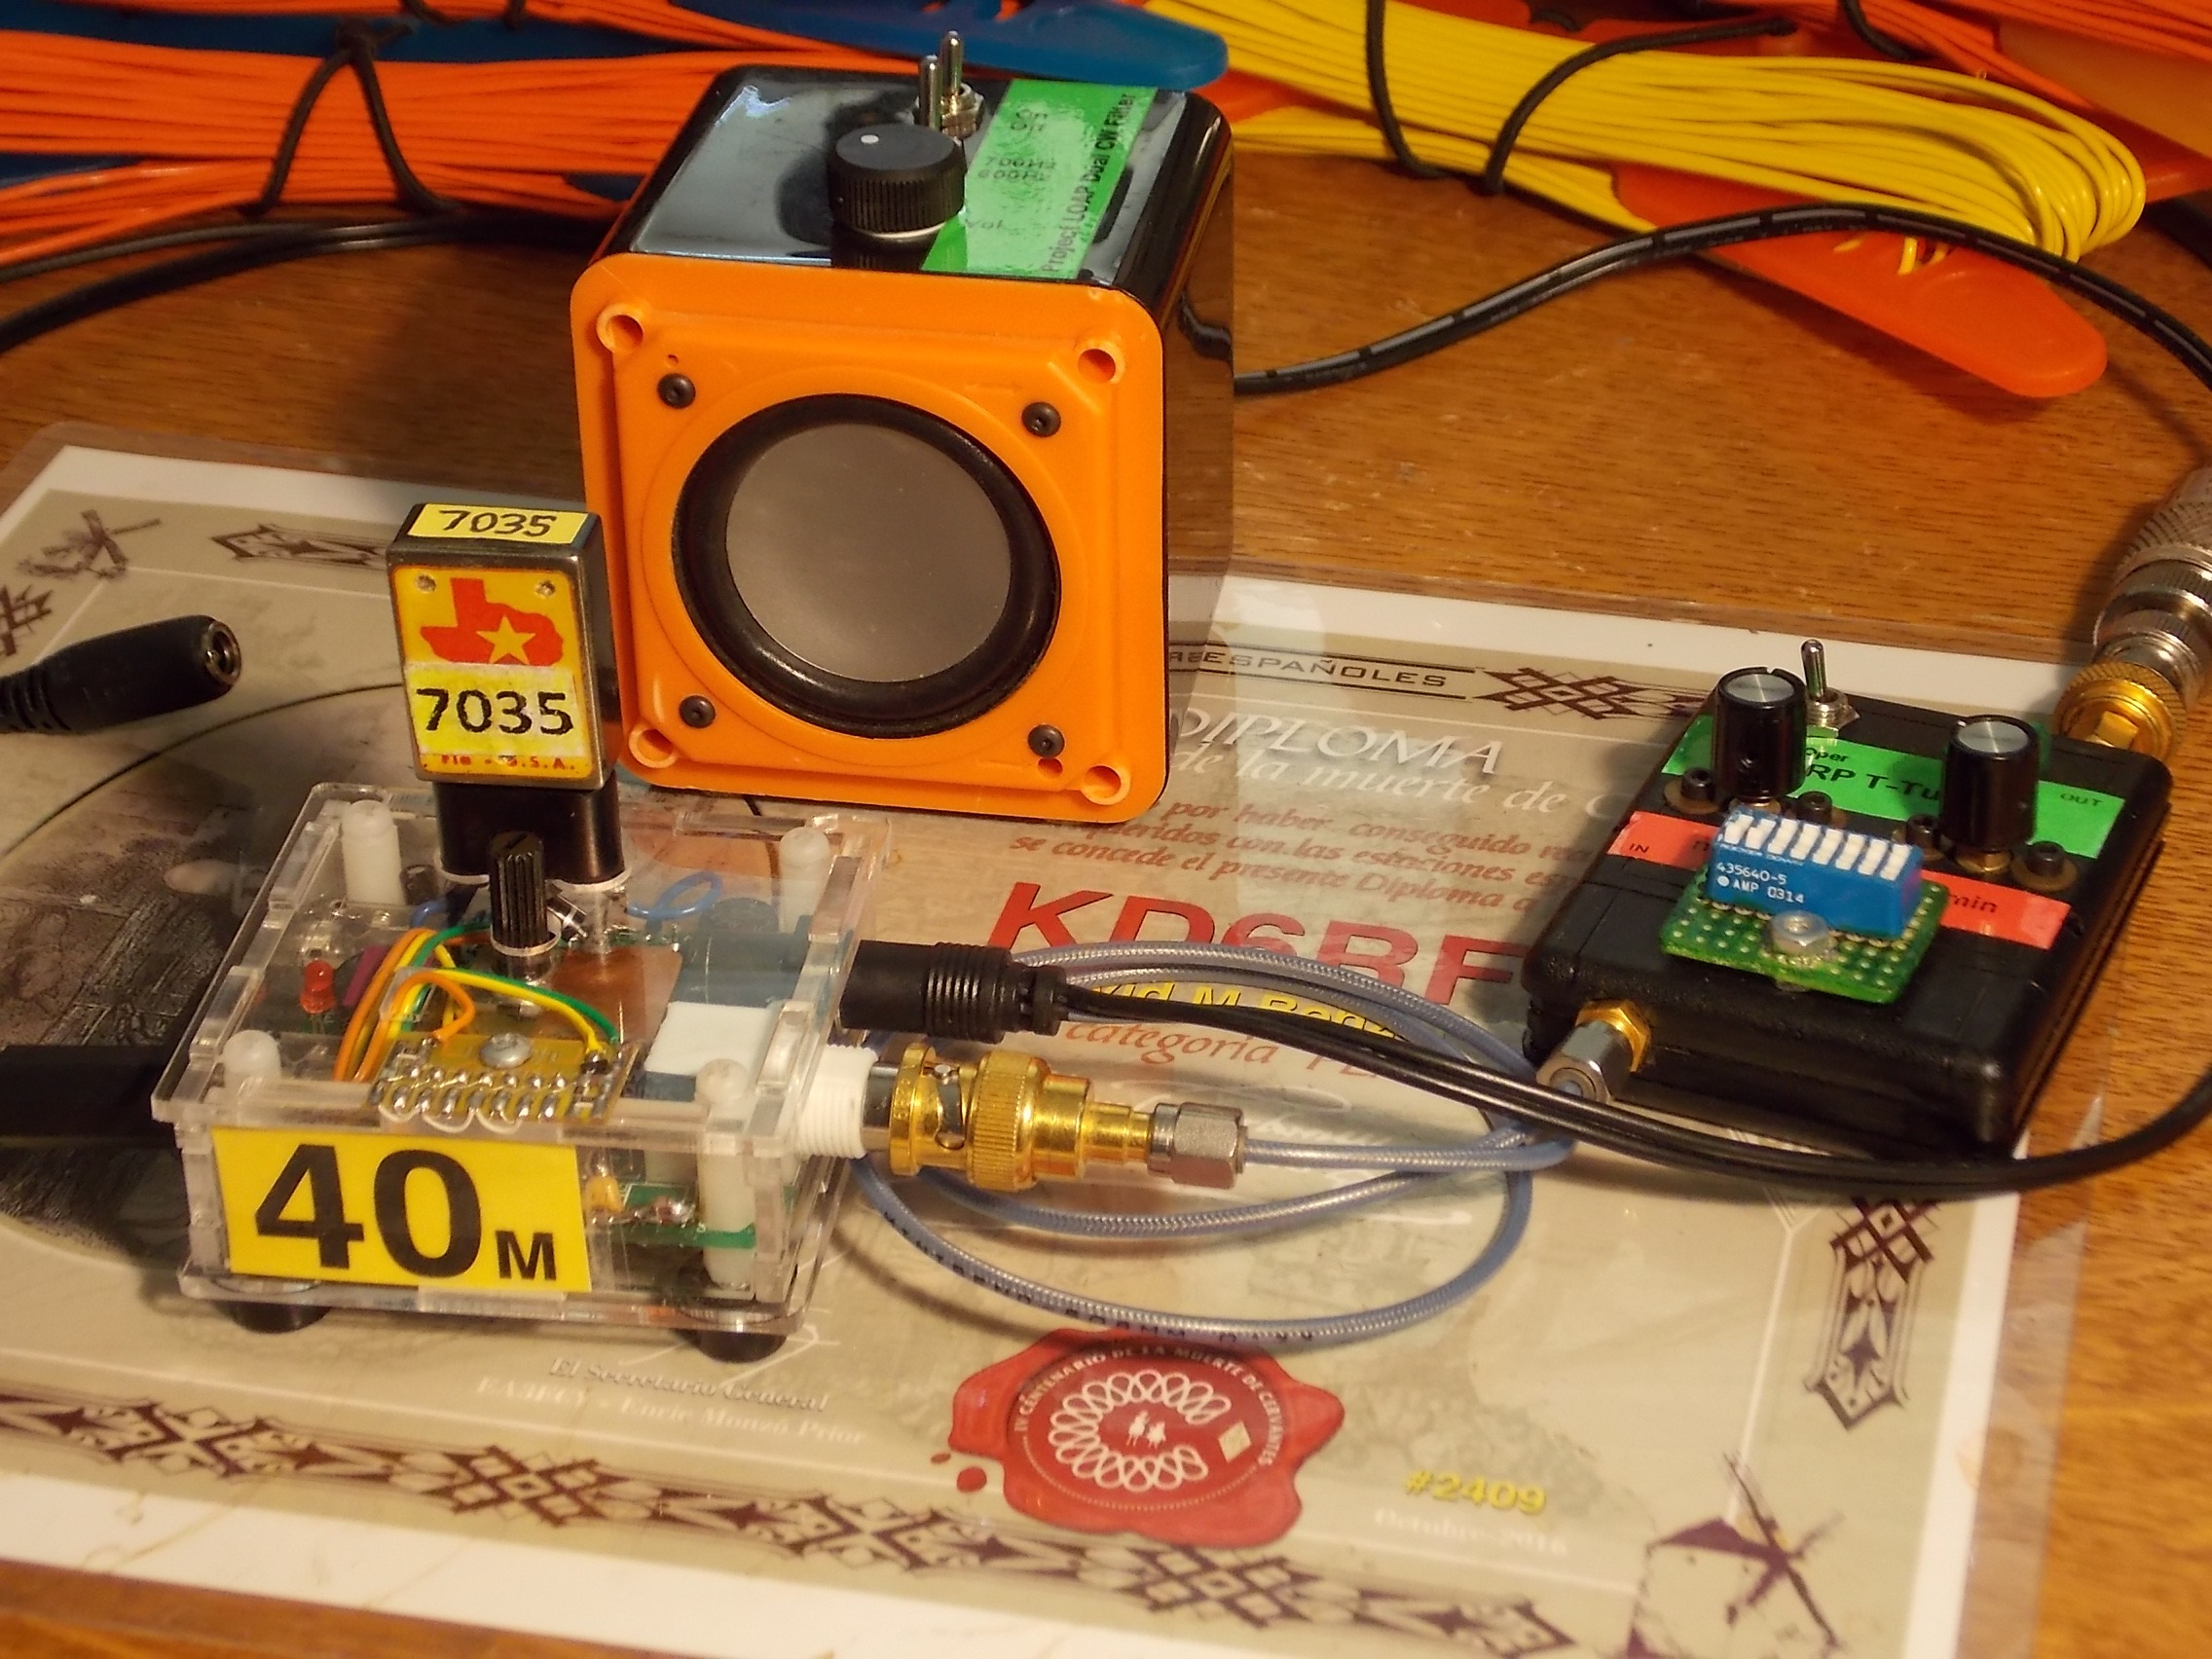
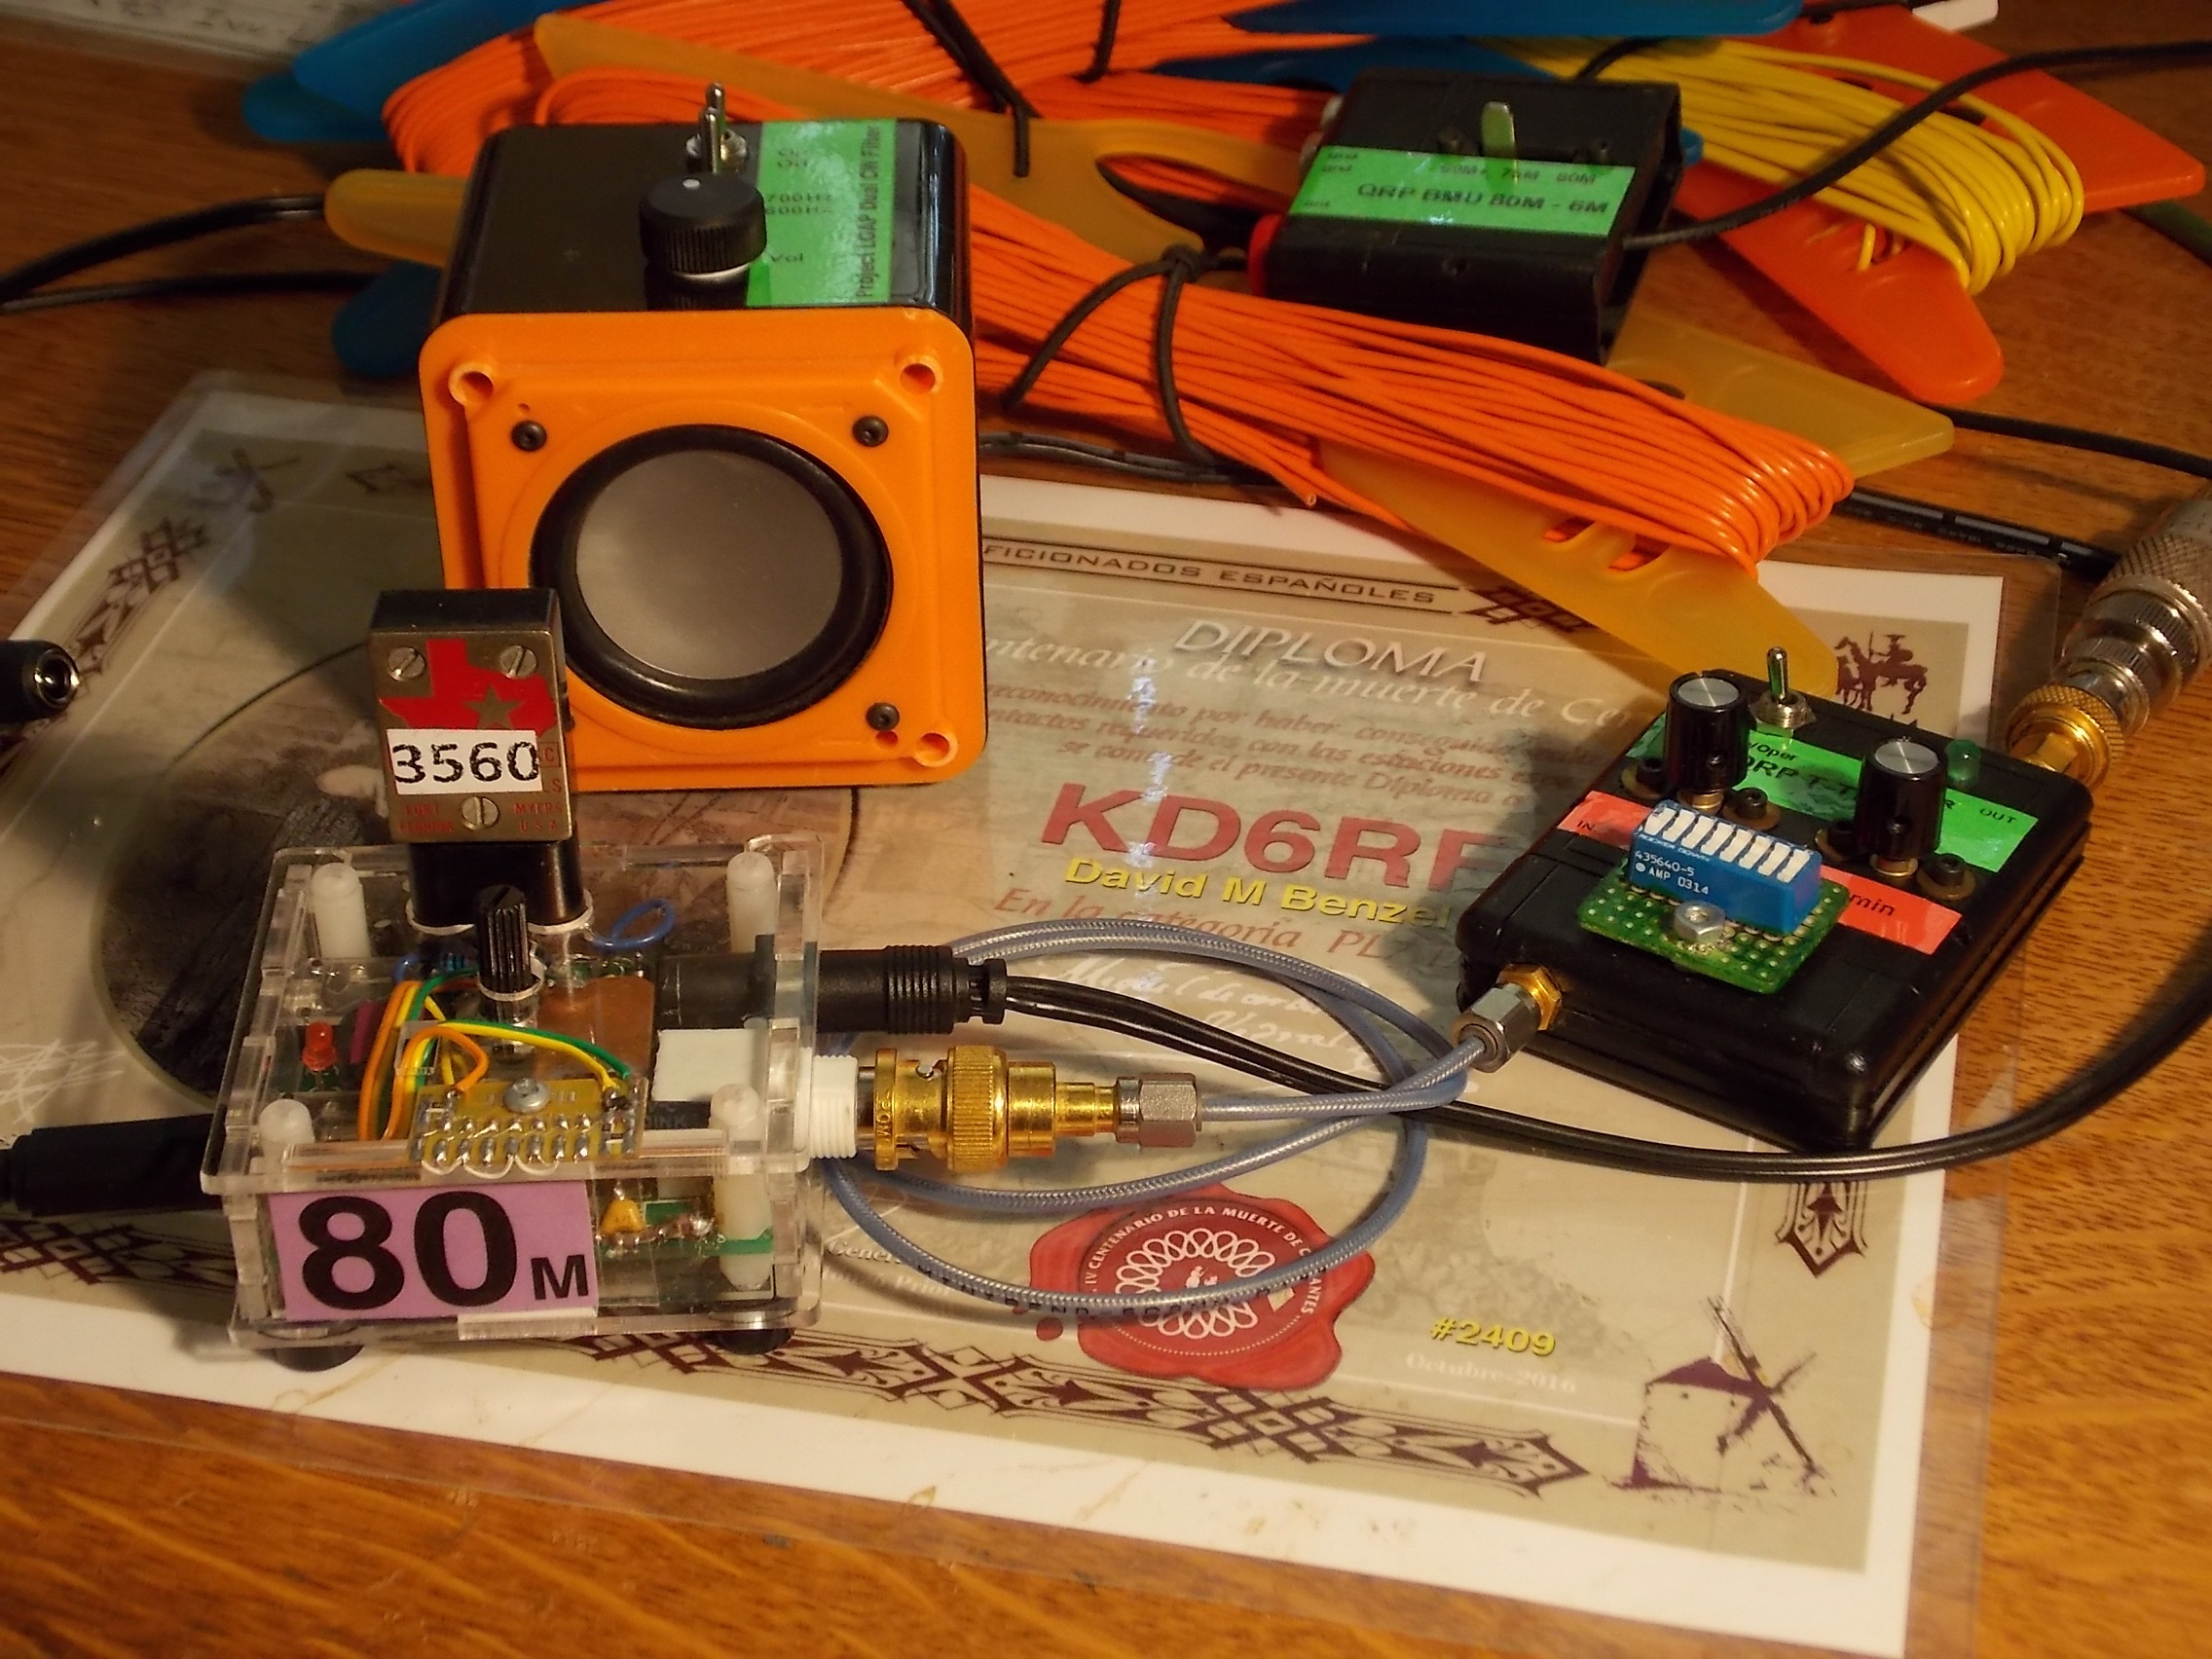
Here is the system with 1.5 Watt Pixie, external crystal access, touch keyer, dual frequency CW filter, Lithium battery pack, and speaker level audio amplifier. The external T-Tuner and SWR bridge is shown to the right. The Base matching Unit for 42 to 45 foot vertical and Inveted-L antennas is shown in the background.
There’s nothing special about the construction techniques or surface mount components that I used; I simply wanted a reasonably small package. There’s no reason this can not be implemented with larger leaded components if desired.
Connect the power plug to the Pixie to supply it with 12 Volts, connect the audio plug to the Pixie’s audio jack, attach antenna and Tuner / BMU if required, and you’re ready to make contacts.
OTHER MODS
I show some other Pixie mods for this project in other articles:
1 to 2 Watt Power Output Mod ===> http://vtenn.com/Blog/?p=1348
QRP T-Tuner and SWR Bridge 80 M and Up ===> http://vtenn.com/Blog/?p=1552
QRP BMU for 42 to 45 ft antennas 80 M and Up ===> http://vtenn.com/Blog/?p=1562
Copyright Dave Benzel – KD6RF – 2017-Mar-1
10,391 total views, 3 views today